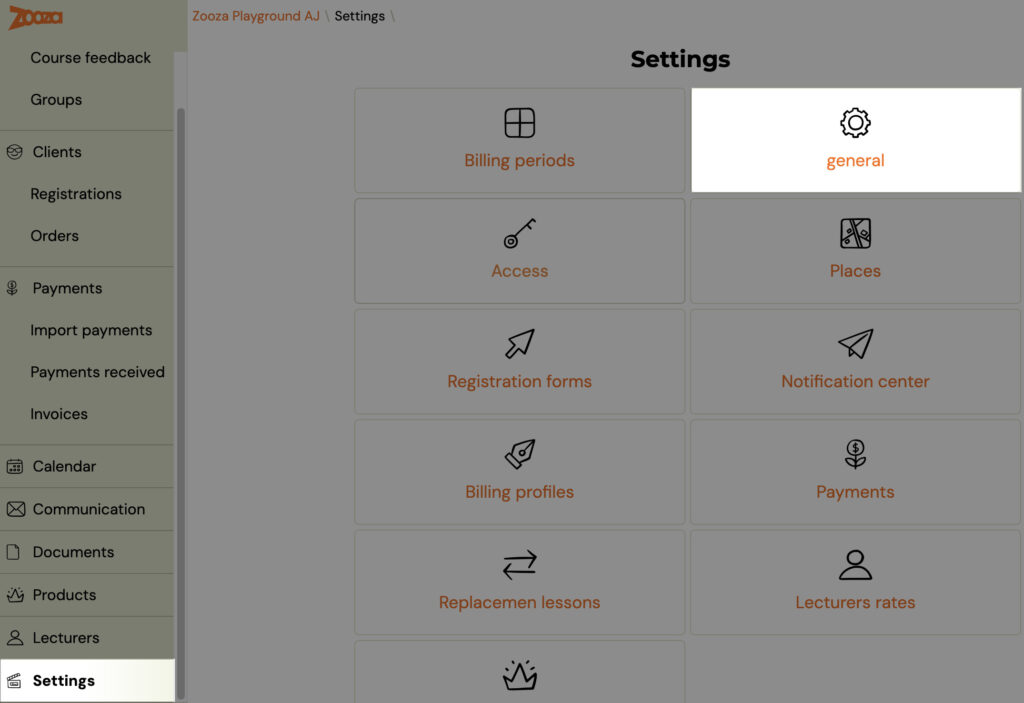
The client’s attendance can be managed in the application by an administrator or a lecturer. You determine the permissions for managing attendance during the initial setup of the application in the General Settings in the Settings section. Lecturers and owners manage attendance in the most standard way.
You can allow attendance management for tutors with the following privileges:
- Full report – option to set Arrived, Did not arrive, Checked out, Select replacement lesson. If you select this option, any user with the tutor role will also be able to set up alternate hours for clients based on their request.
- Limited report – the possibility to set only whether the client came or didn’t come – i.e. to record only the real attendance at the lesson.

Where can you find client attendance records?
There are three ways to look at a client’s attendance.
Through the calendar
This view is the most used among our clients as it is very clear and comprehensive.
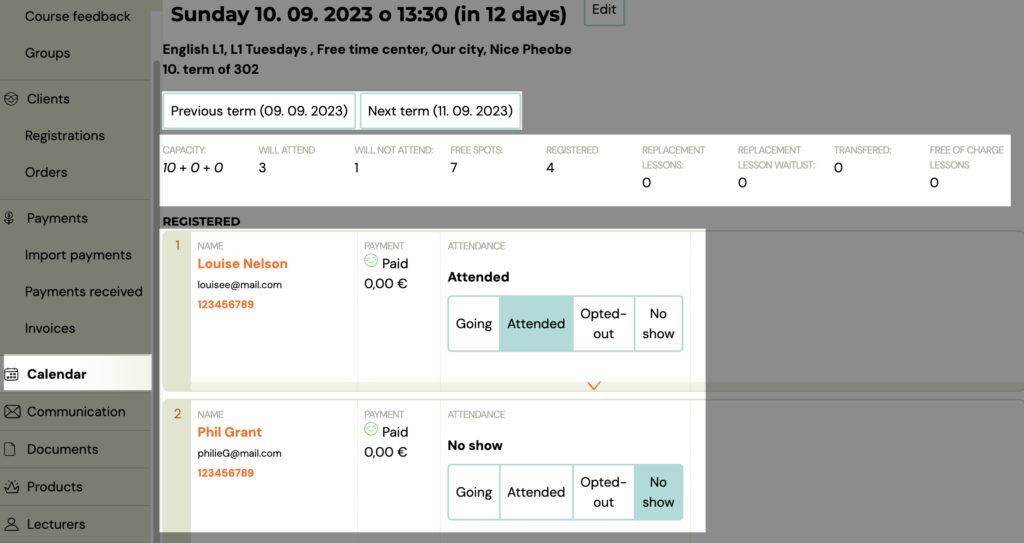
- Click on the Calendar tab and select the date on which you want to manage attendance.

In this view, you can customize the calendar view via the filter to the left of the calendar.
In the following view you will see a complete summary of all important information about the date availability, individual registrations and client attendance.
The buttons at the top of the screen allow you to quickly and easily move to the previous or next date of the selected course.
Below you will find an overview of the occupancy rate and the number of each type of registration.
Next, you will see a list of all registrations for the selected course term, where you can record the attendance of your clients.
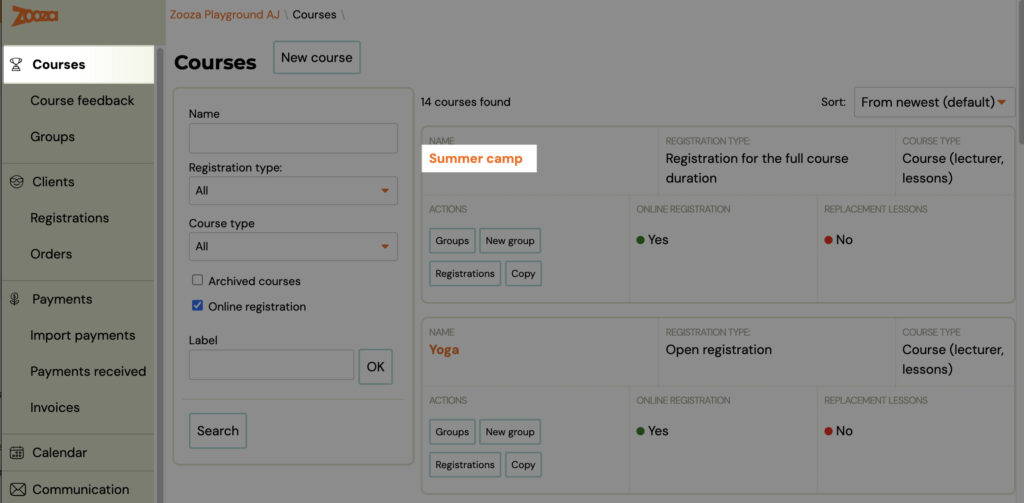
Through the courses
We recommend this view of registrations if you wish to view registrations for a specific course and term.
- Click in the Courses tab on the course in which you want to see the attendance of your clients.
- Scroll down to the Groups section (of the specific course) and click on the Registrations button within the group for which you want to view attendance
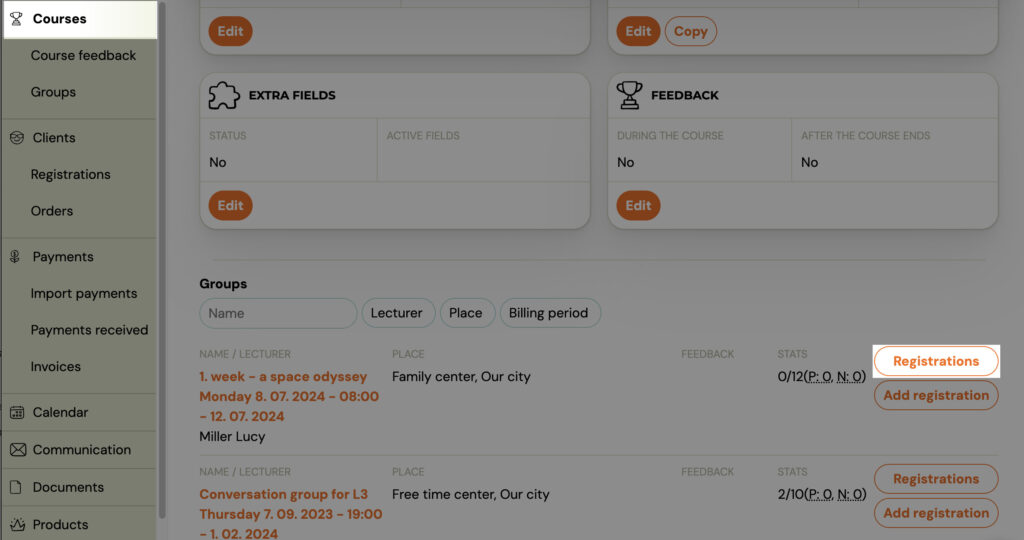
- You can also view registrations after opening a specific group by clicking the View Registrations button
At this point, you will see a list of registrations for your selected course and term. Within the list, you have several options for setting up a filter or exporting or importing data. But you will also find an option to send an email or SMS to the client(s). More information about communication with clients can be found HERE

When you click on the name of the selected client, you will see a detailed client card, where you will find information about the client’s registration, personal data, payments for the course, notes and records of communication with the client.
- To manage attendance, click the Attendance tab at the top of the screen.

Through registration
This view of registrations is recommended if you wish to view a specific registration for a single client.
- Click on the Registrations tab
- When you click on the tab, you will see a list of all registrations for all courses, where you again have the same options for working with the data as in the previous view.
- You can search between registrations using the filter.
- When you click on a client’s name, you will be presented with a detailed client card where you have the option to manage attendance in the Attendance tab. This view is identical to the previous view
What are the options for adjusting a client’s attendance?
In the Attendance tab, you will see the client’s attendance for each term within the group and course. That is, whether the client:
- Arrives – displayed if the client is enrolled in the course and has not yet opted out of the term
- Arrived – recorded by the lecturer or application administrator based on actual attendance at the term
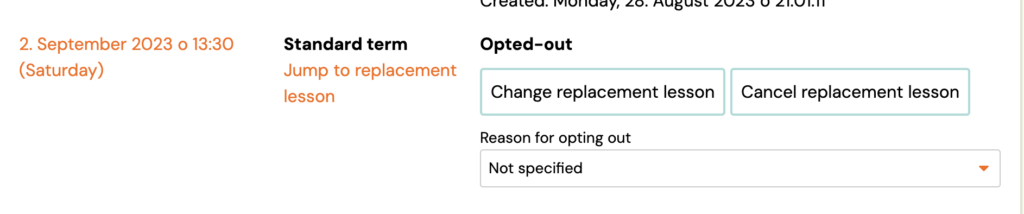
- Opted out – displayed if the client has opted out of the term through their profile in a timely manner. In this state, the client can choose a replacement lesson via their profile (depending on the course settings). You can also make this selection, or change your selection, by clicking on the Choose replacement lesson.
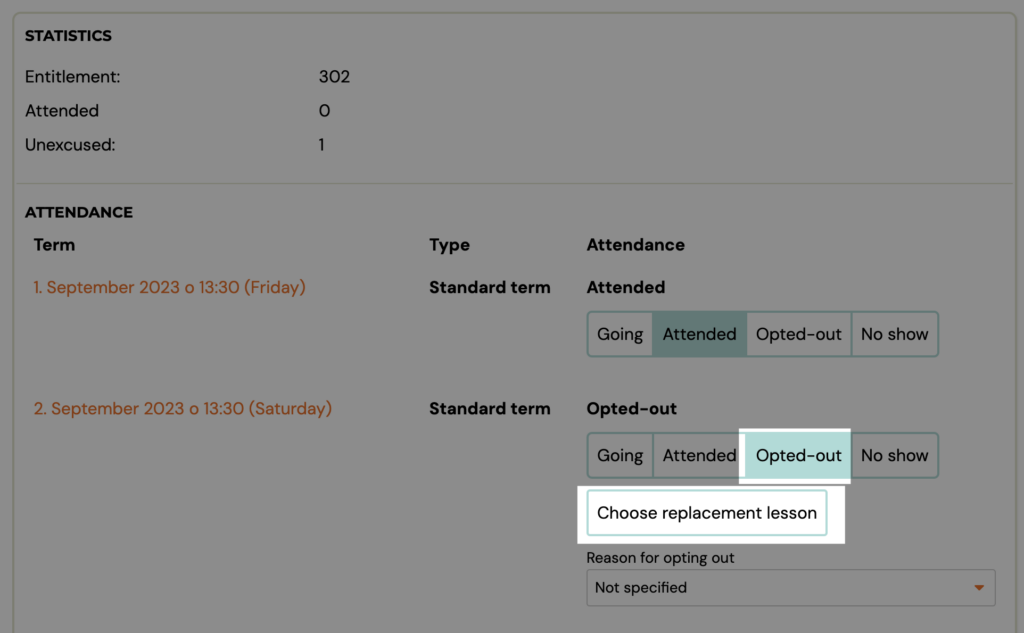
- When you click on this button, you will see a list with the dates for which you can sign up the client and a table showing the conditions for using spare hours (based on the general settings for the courses), where you can also change them. To select a replacement lesson, click the Choose button next to the date.

- When you set up an alternate appointment, the status of the original appointment and the alternate appointment will change in the client’s attendance record as follows:
- Original date – you still have the option to change the date of the replacement lesson or cancel it
- No-show – recorded by the lecturer or application administrator based on actual non-attendance
Change and cancellation of replacement lesson
You have the option of changing or cancelling an replacement lesson as part of the client’s attendance policy. You can make the change within the selected registration under the Attendance tab or the Credits tab. More information on how to edit attendance and credits can be found HERE
- click Change replacement lesson orCancel replacement lesson
Note: Clicking the Cancel Replacement Lesson button will return the client’s lesson to its original state, i.e. the client will be re-enrolled for the original appointment regardless of the current capacity of the appointment, and the client can choose a new replacement lesson. - To change the replacement lesson, click the Change Replacement Lesson button and then reschedule the lesson according to the client’s options and requirements.