Within the payment templates, you have several options on how to use them for your courses and clients. Please refer to the instructions for more information.
Setting up payment templates
In order to set up payments on a course, you need to create payment templates first. To set them up, proceed as follows:
- click on the Settings tab in the left menu and then click on the Payments

- To add a new payment template, click the Add button at the top of the screen and fill in the required parameters for the template

Select one of the options as required:
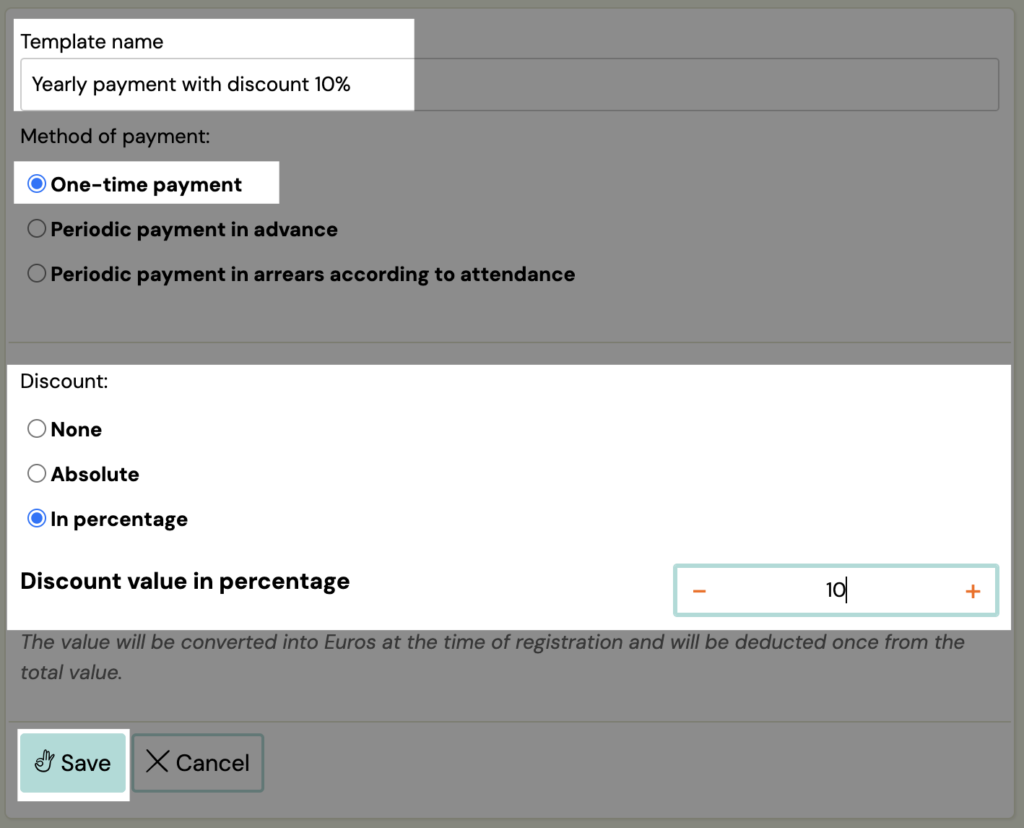
One-time payment – you have the option to set up a one-time payment for the course.
For example, if a client chooses a course that lasts half a year, but does not want to pay monthly, they choose to pay for the entire course at once.
For such a payment you can give a discount either none, in EUR or as a percentage.
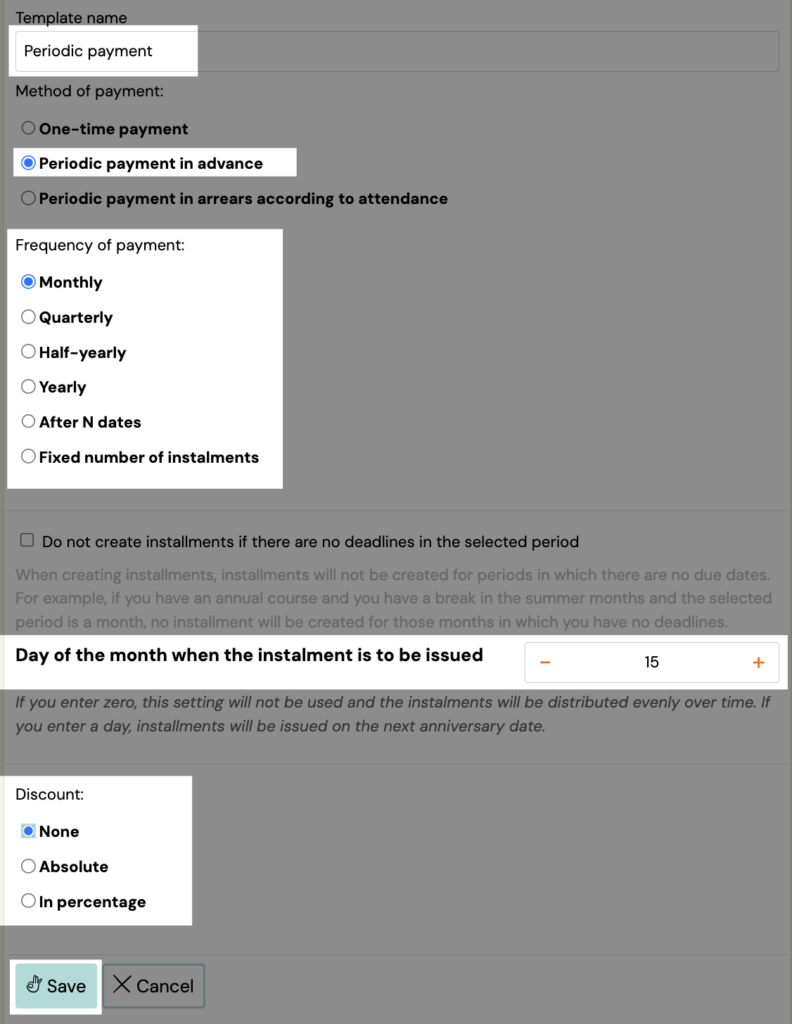
Periodic pre-paid payment – you have the option to set whether the course can be paid gradually, i.e. in frequency. Here you select from the options – Monthly, Quarterly, Semi-annually, Annually, After N terms (the number of terms after which the next installment for the course will be issued), Fixed number of installments (the number of installments into which the price for the course will be divided).
The course provider has the option to grant a discount for this type of payment either none, in EUR or as a percentage.
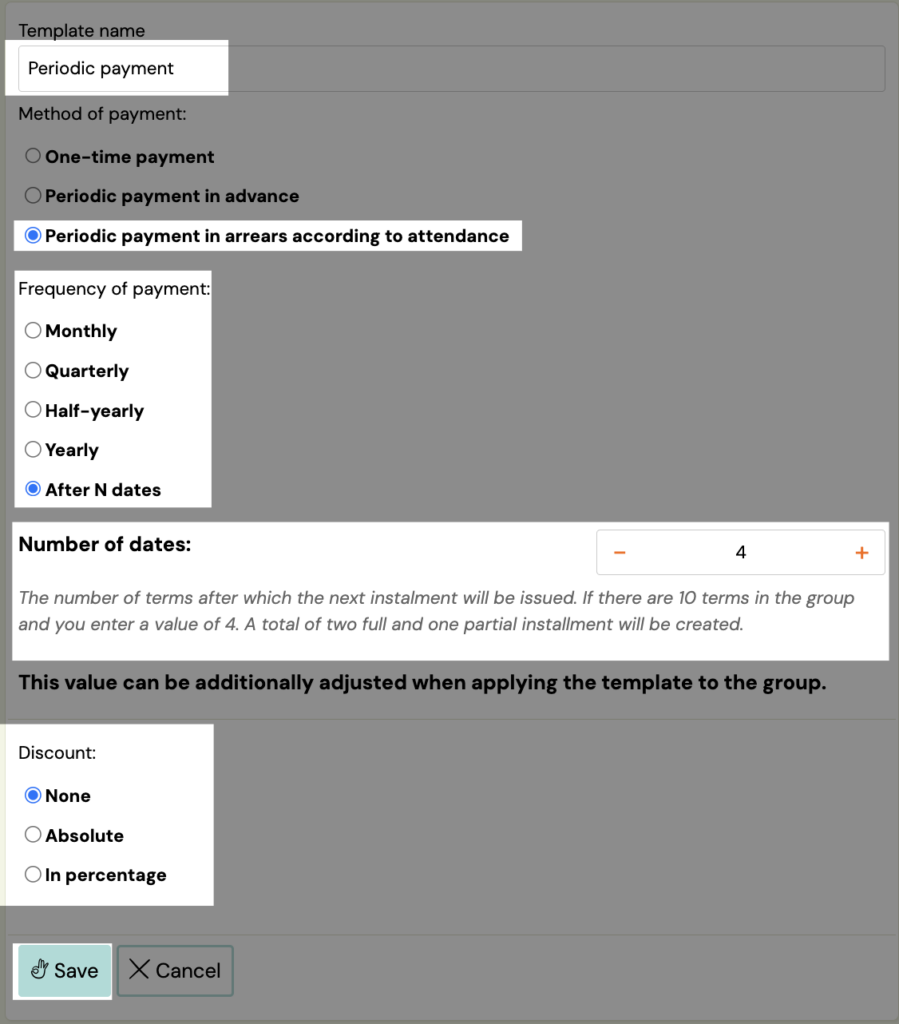
Perodic payment paid in arrears according to attendance – you have the option to set whether the course can be paid in stages, i.e. in frequency, according to how many dates of the course the client has attended. This payment will be paid by the client only after his/her actual participation, i.e. according to attendance.
In this case, a situation may also arise where, for example, if the client does not attend even one course date with a monthly frequency, the system does not generate any instalment/payment order.
Here you choose from payment options and discount options, just like with recurring prepayment – see above.
Save the template by clicking the Save button
Additional template settings and its activation in courses
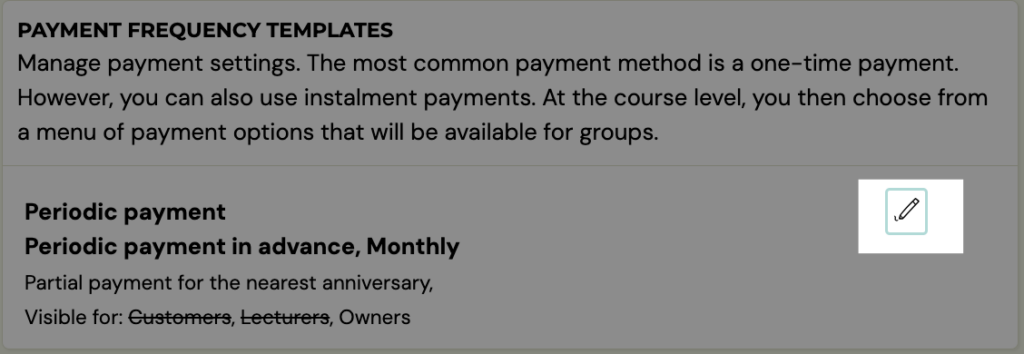
In the payment settings, you can edit individual templates, set their visibility to customers/tutors or delete a template. You can also quickly and easily activate the template on the courses of your choice.
To change and modify the template or activate it on the course, please follow these steps:
- In the list of payment templates, click the pen icon next to the template you want to edit
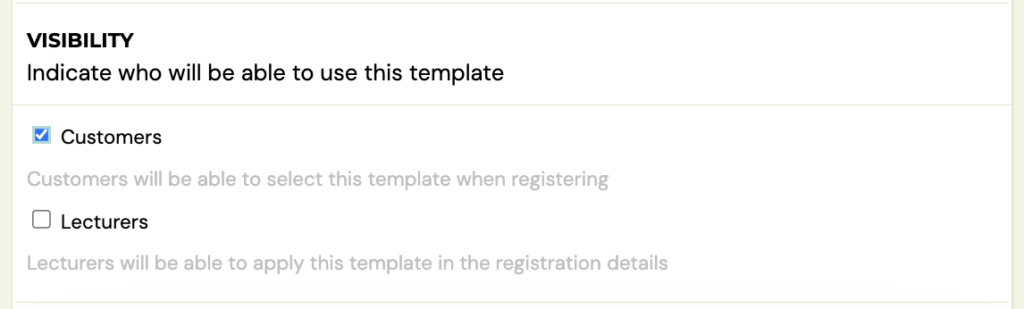
- In template editing you have the option to set the visibility of the template, i.e. what group of people will be able to use this template – Customers, Lecturers or both.
- Customers – you choose the option to have the template visible to customers directly when they register on your site.
- Lecturers – visibility for lecturers means that the lecturer will also be able to assign registrations to a given template
- Below in the courses section you have a list of your courses and for each of them you can activate or deactivate the template
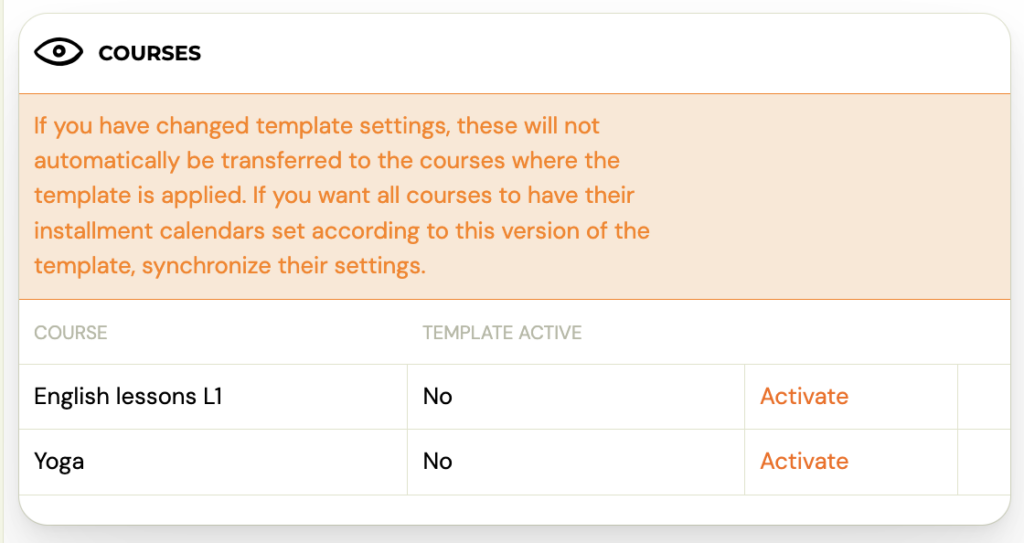
- When you make changes to the template, we recommend that you Sync Settings. This will ensure that any changes made to the template will also be reflected in courses and groups where it has already been activated.

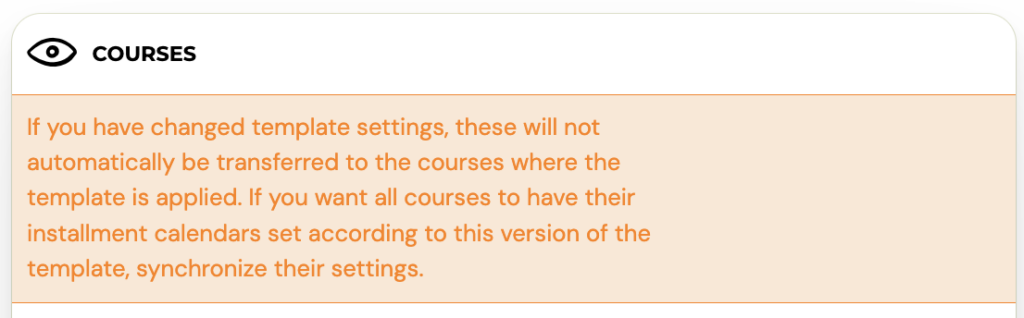
- Note: If you have changed template settings, these will not automatically be transferred to the courses where the template is applied. If you want all courses to have their installment calendars set according to this version of the template, synchronize their settings. The system also keeps alerting you
- Then Save the changes. Alternatively, you also have the option of using the Delete template

The payment templates created in this way can then be used and inserted into your new or existing courses/groups.
How to insert payment templates into a course/group?
The created payment templates need to be inserted into newly created or already existing courses. The templates created in this way can be combined in the courses according to your wishes and needs. This means that you can use multiple payment templates for one course.
To insert templates into courses, do the following:
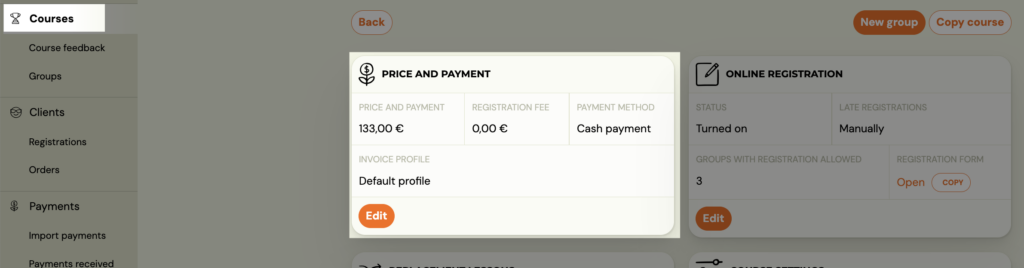
- In the list of courses, click on the name of the course in which you want to add a template or check the activation of the selected templates
- In the Price and Payment section, click the Change button
- Below in the Payment Frequency section you can see which payment templates you have Active and which Inactive. Active payment templates are the ones highlighted in colour (yellow background under the text, blue knob)
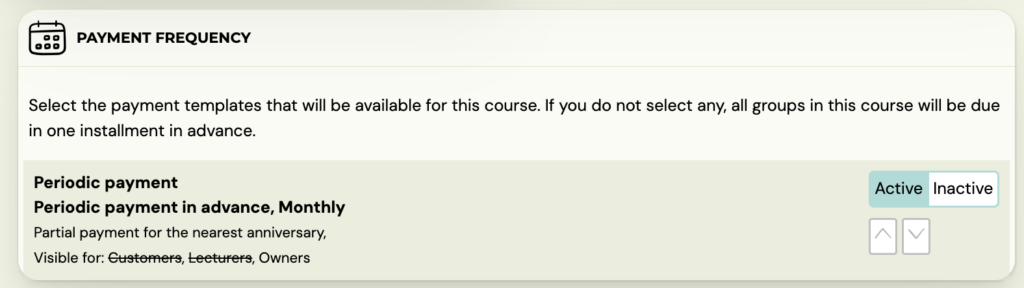
- If you wish to activate the template, click on the white Active button
- If you wish to deactivate the template, click on the white Inactive button
When you create a new group
This selection of templates will appear in the menu when you create a group for the course, where you again have the option to decide whether or not to enable this payment option. To activate the template on the group, click on the white Active button
Then save your selection by clicking Create.
When inserting into an existing group. Edit payment templates in existing groups
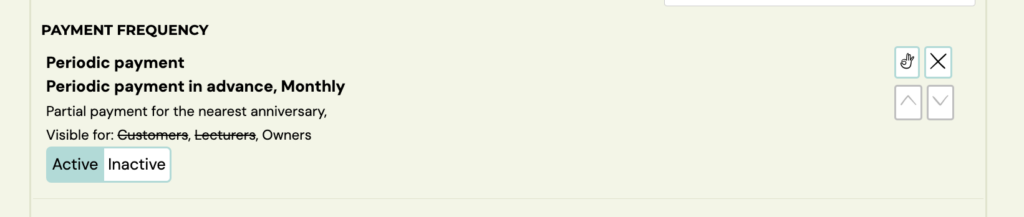
Select a group. In the Payment Frequency section, click the Add Template button. You will only see the ones that are activated on the course.

Zobrazia sa len tie, ktoré sú aktivované na kurze.
When you click on the pen icon, you will be presented with the option to activate/deactivate the template. Then click on the pipe icon and the Save button at the end of the screen to confirm the changes you have made.

To delete a template from the group, click on the trash icon.
You can use the arrow keys to change the order of the templates and set them as you want them to appear in the registration form.

This selection of payment options will then be displayed in the registration form on your website as follows:
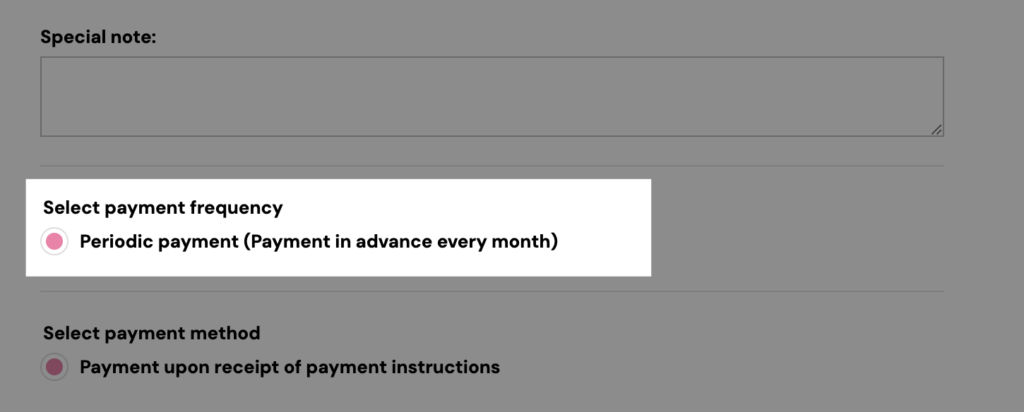
The client has to choose one of the offered options and the final price for the course is recalculated according to the client’s choice, if it is affected by this choice (if a discount has been set in the template).
Note: If a client registers for a course that has already started and you have set up manual approval for late registrations in the course settings, the payment type will not appear on their registration. Such registrations are marked as late by the application and require manual editing.
- Adjust the amount owed as needed or add a compliant payment template to your registration
- Manually change the registration status to Registered
How to insert payment templates into the registration?
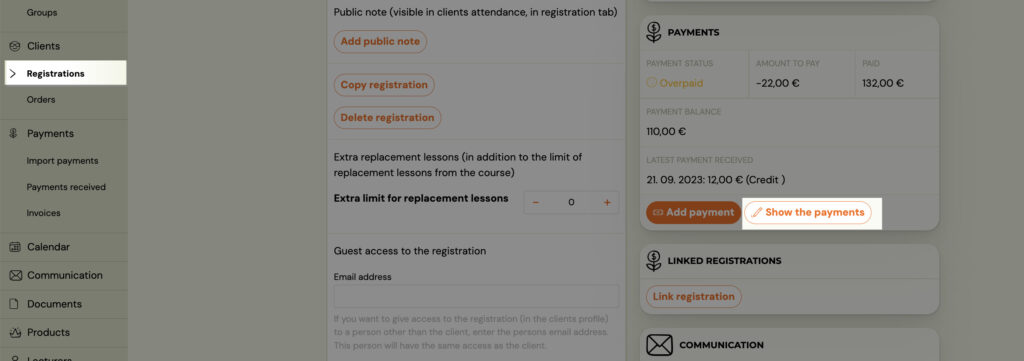
- Select the registration you want to edit.
- Under Payments, click View Payments
- In the Installment Plan section, click Create (if no installment plan has been set up on the registration) or Change (if an installment plan has already been set up on the registration).

- This will open the settings for creating a payment plan. Select the options that suit you and click continue. If you enter a value in the Registration Fee field, it will be applied as part of the first instalment – so the first instalment will be increased by the value of the registration fee.

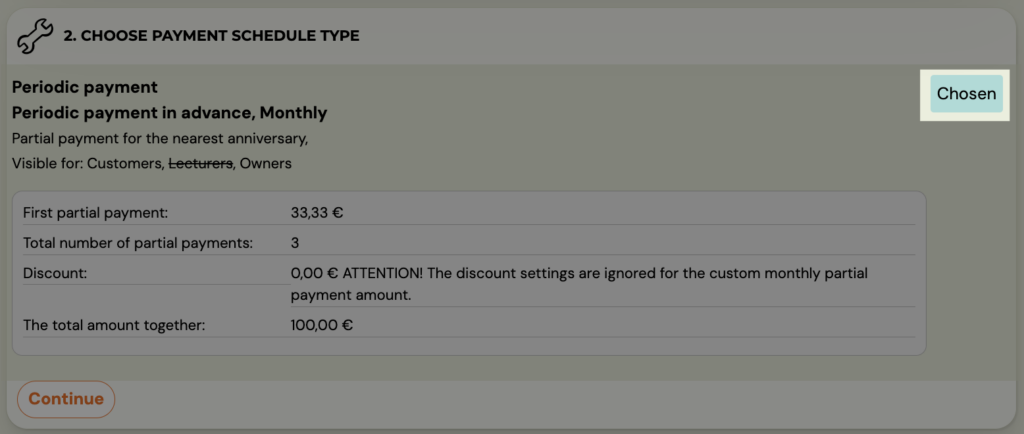
- Click the Select button next to the template you want to apply. Zooza will show you what the repayment amount is, how many repayments will be incurred, what the discount is and what the final amount paid by the customer is after all repayments have been made. Then click Continue
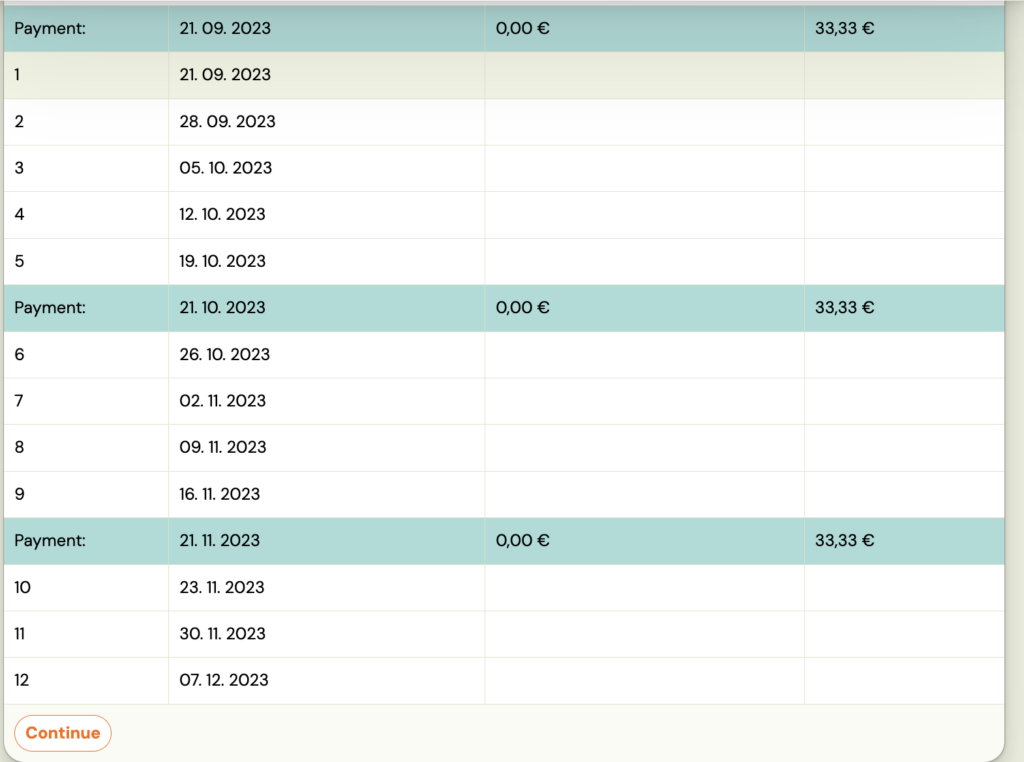
- In the next step, check your settings and click Continue
- To apply the instalment plan to a given registration, confirm your selection by clicking on the Finish button.

The payment schedule entered in this way will also be automatically reflected in the client’s profile and invoices for payments will be issued and notifications for payments will also be sent to the client based on it.
How to delete the payment template on registration?
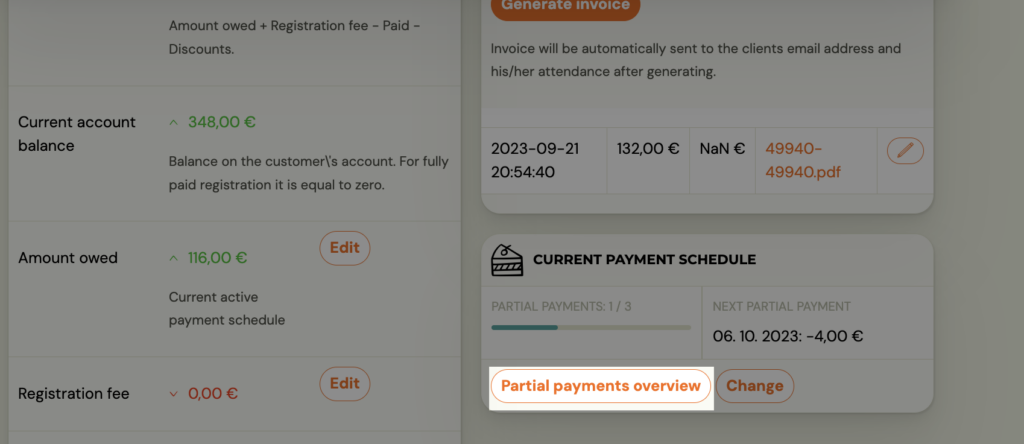
You can delete the set instalment plan on the regisdtration by clicking on the Partial payments overview button.
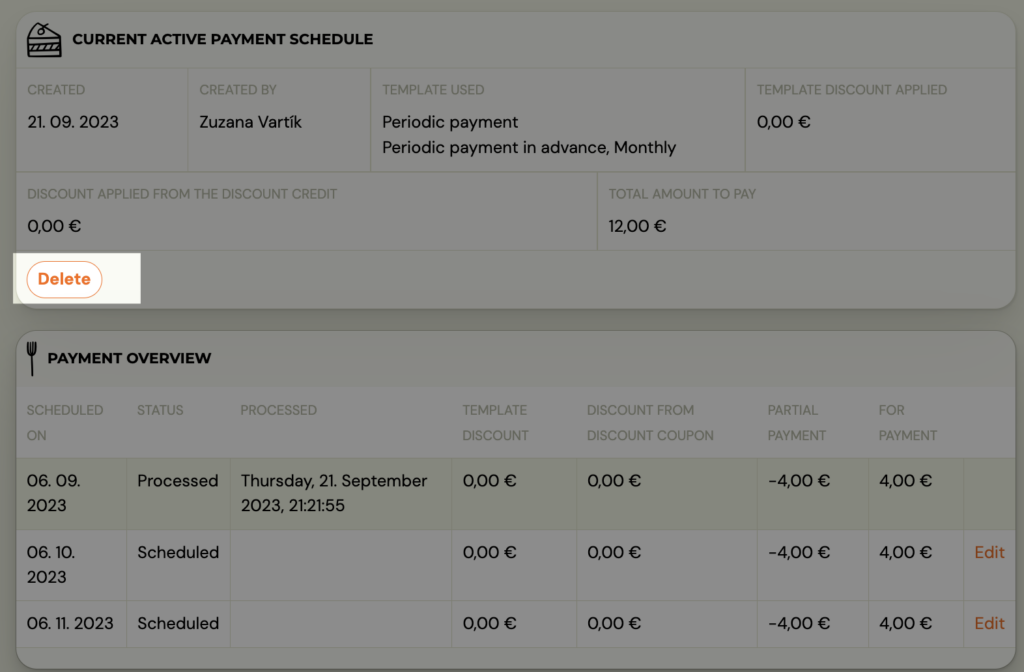
Then click the Delete button. The registration reverts to a no-payment status.
For a better idea, you can also watch the video manuals: